Back

User Interface Design Process

STEP 1

Wire framing

Wireframing is like creating a blueprint for a website or app. It helps me, as a designer, to plan and organize the layout of the interface before diving into detailed design work. I use simple shapes and lines to outline the structure, placement of elements, and the flow of information. It’s like sketching out the skeleton of a project, focusing on functionality rather than colors or visuals. This helps me and others involved in the project understand how the user will interact with the interface. 

Tips
STEP 2

Moodboarding

When I work on UX projects, one of the first things I do is create a moodboard. Think of it as a collage of images, colors, and typography that helps me set the overall look and feel of the design. I gather pictures, fonts, and other visual elements that inspire me and represent the desired mood or atmosphere of the project. This helps me and others involved in the project get a sense of the direction and aesthetic we want to achieve. It’s like creating a visual roadmap for the project.

Tips
Tools
STEP 3

Typography

I’ll try to explain typography in a simple language. When I work on UX/UI projects, I pay close attention to typography. Typography is all about how we use fonts and text in design. It’s like choosing the right words and fonts to make information clear and visually appealing. I focus on selecting fonts that are easy to read and match the project’s style. I also consider font sizes and spacing to ensure text is legible and well-organized.

Tips
Tools
STEP 4

Color Theory

As a designer, I pay close attention to color choices because colors can evoke emotions, influence user behavior, and enhance the overall user experience. Understanding color theory helps me select colors that work harmoniously and effectively convey the desired message. I consider factors like color psychology, color combinations, and contrast to create visually appealing and accessible designs. For instance, I might use warm colors like red or orange to grab attention or cool colors like blue or green to create a sense of calm.

Tips
STEP 5

Visual Hierarchy

In the design process, visual hierarchy refers to the arrangement and organization of elements to guide users’ attention and prioritize information. As a designer, I use different techniques such as size, color, contrast, and spacing to create a clear and intuitive visual hierarchy. This helps users quickly understand the content and navigate through the interface effectively. By giving prominence to important elements and de-emphasizing less relevant ones, I ensure a seamless user experience.

Tips
STEP 6

Grid Systems

As a UX designer, I utilize grid systems to create structure and organization within a user interface. A grid is a framework of horizontal and vertical lines that act as guides for placing and aligning elements consistently. By using a grid system, I ensure that elements are properly aligned, maintain visual harmony, and improve the overall user experience. Grids help in achieving a balanced layout, making it easier for users to navigate and understand the content.

Tips
STEP 7

Iconography

As a UX designer, I understand the importance of iconography in creating intuitive and visually engaging user interfaces. Icons are graphical representations that convey meaning and provide users with visual cues to understand functionality and actions. Iconography helps users quickly identify and interact with elements, enhancing the overall user experience. I carefully select and design icons that are simple, recognizable, and consistent with the application’s visual style

Tips
STEP 8

UI Animation (optional)

As a UX designer, I recognize that UI animation can greatly enhance the user experience by adding a touch of interactivity and delight. UI animation has become a trending practice in modern web applications, especially with the rise of micro animations. UI animations are subtle, purposeful animations applied to UI elements, transitions, or interactions. They can provide visual feedback, guide users’ attention, and communicate the system’s state effectively. I carefully select and design UI animations that align with the overall user experience goals, ensuring they are seamless, lightweight, and meaningful.

Tips
Tools
STEP 9

Prototyping

Let me explain the concept of prototyping in the UX/UI process using simple language. As a UX/UI designer, prototyping is a crucial step in creating user-centered designs. It involves creating interactive mockups or models of the interface to test and validate design concepts before development. Prototyping allows me to gather valuable feedback, iterate on design decisions, and refine the user experience. A popular approach to prototyping is utilizing the atomic design methodology, which involves breaking down the interface into reusable components that can be combined to create more complex designs. This helps maintain consistency and scalability throughout the design process.

Tips

Atomic Design

Essential Tips

Before moving further let me give you a brief introduction to Atomic Design. Atomic Design is a methodology introduced by Brad Frost that breaks down user interfaces into modular components, allowing for scalable and consistent design systems. It provides a structured approach to design, enabling designers and developers to create reusable components that can be combined to build complex interfaces.

The Atomic Design methodology consists
atom
Atoms

Atoms are the basic building blocks of the interface, representing the smallest and most elemental components, such as buttons, icons, inputs, or typography styles. They are simple, standalone elements that can't be broken down any further.
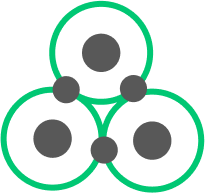
molecule
Molecules

Molecules are formed by combining atoms. They represent groups of atoms working together to perform a specific function or task. Examples include a search bar (combining an input field and a button) or a navigation menu (combining buttons and icons).
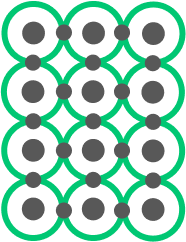
organism
Organisms

Organisms are more complex components that consist of groups of molecules and atoms. They represent distinct sections or modules of the interface, such as a header, a product card, or a form. Organisms can be reused across different screens and pages.
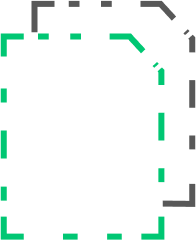
templates
Templates

Templates are specific layouts that provide the structure and overall arrangement of organisms on a page. They define the general composition of the interface and guide the placement of various elements.

pages
Pages

Pages are the final output where templates, organisms, molecules, and atoms come together to create a fully functional user interface. Each page represents a unique user experience or screen within the application.

STEP 10

User Testing

User testing is a critical step in the UX/UI process that involves gathering feedback from real users to evaluate the effectiveness and usability of a design. As a UX/UI designer, I recognize the significance of user testing in creating user-centered interfaces. By observing how users interact with the prototype or product, I can identify potential issues, understand user preferences, and make data-driven improvements. This iterative process ensures that the final design meets user needs, enhances user satisfaction, and maximizes the overall user experience.

User Testing Tool
  1. Usability testing platforms like UserTesting and Maze
  2. Remote user testing tools such as Lookback and UserZoom
  3. Prototyping tools with built-in user testing capabilities like InVision and Marvel
  4. User feedback and analytics tools such as Hotjar and Google Analytics
Anurag Chatterjee
Anurag Chatterjee
http://www.anuragchatterjee.com
I am Anurag Chatterjee, a skilled IT professional with more than a decade of experience in the field of UI/UX development and design. I love designing appealing interfaces, producing wireframes and mock ups, and putting design systems into practice are my primary areas of competence. I also have great programming abilities in modern frameworks like React, Angular, and Node.js.

    This will close in 0 seconds